Choose a different version or distribution
Introduction
Before we begin talking about how to set up code-server on Ubuntu 20.04, let’s briefly understand - What is code-server?
The code-server is a Microsoft Visual Studio Code that runs on a remote server. It is accessible directly from the browser and it's a modern code editor. Further, it is integrated with Git support, a code-debugger, smart auto-completion, and other customization features.
Hence, this means that you will be able to use various devices that run on various operating systems. It also enables a consistent development environment easily.
In this tutorial, you will set up a code-server on Ubuntu 20.04. Also, we will answer some FAQs regarding the code-server installation.
Prerequisites
- A server that runs on Ubuntu 20.04 with at least 2GB RAM.
- Proper root access, a sudo, as well as a non-root account
- Nginx installed on the server
- Also, fully registered domain-name to host the code-server pointed directly to your server
Step 1 - Installing the code-server
1) You will download the latest version of the code server. Create a systemd service that will keep code-server running in the background. Also, you need to specify the restart policy for the service, so that code-server is available after possible crashes or reboots.
2) The data pertaining to code-server contains in a folder namely ~/code-server. Create it by running the command:
mkdir ~/code-server
3) After that, navigate to it:
cd ~/code-server
4) Now, visit the Github releases page of code-server and get the latest Linux build. You need to download it using wget by running the following command:
wget https://github.com/cdr/code-server/releases/download/3.2.0/code-server-3.2.0-linux-x86_64.tar.gz
5) After that, unpack the archive by using the following command:
tar -xzvf code-server-3.2.0-linux-x86_64.tar.gz
6) Then you will get a folder named as the original file downloaded earlier. It will contain the code-server source code. Now, copy it to the /usr/lib/code-server. You will be able to access it system-wide, run the following command:
sudo cp -r code-server-3.2.0-linux-x86_64 /usr/lib/code-server
7) After that, create a symbolic link at /usr/bin/code-server. Point it to the code-server that is executable:
sudo ln -s /usr/lib/code-server/code-server /usr/bin/code-server
8) To store the user data, create a folder for code-server, run the following command:
sudo mkdir /var/lib/code-server
9) After downloading, create a systemd service. It will keep the code-server running in the background at all times. Now store the service configuration in a file, to the /lib/systemd/system directory. Create it using the following command:
sudo nano /lib/systemd/system/code-server.service
Also, add the following lines:
/lib/systemd/system/code-server.service
[Unit]
Description=code-server
After=nginx.service

[Service]
Type=simple
Environment=PASSWORD=your_password
ExecStart=/usr/bin/code-server --bind-addr 127.0.0.1:8080 --user-data-dir /var/lib/code-server --auth password
Restart=always

[Install]
WantedBy=multi-user.target
10) Now, specify the description of the service. State nginx service before this. After that [Unit] section, define the type of the service, then provide the command to execute.
11) Also, specify the global code-server that is executable. It needs to start with a few arguments to the code server. The --bind-addr 127.0.0.1:8080 binds it to localhost at port 8080, hence, only accessible from inside the server. Further, --user-data-dir /var/lib/code-server sets the user data directory, and --auth password authenticating visitors with a password. It is specified in the PASSWORD environment variable.
Replace your_password with the desired password, then save and close the file. Here, the [Install] section orders systemd to start the service when to log into the server.
12) Next, start the code-server service, by running the following command:
sudo systemctl start code-server
13) To check that the system started correctly, observe status by:
sudo systemctl status code-server
You will get the following output:
Output

● code-server.service - code-server
   Loaded: loaded (/lib/systemd/system/code-server.service; disabled; vendor preset: enabled)
   Active: active (running) since Tue 2020-05-12 20:53:29 UTC; 11s ago
 Main PID: 3236 (node)
    Tasks: 14 (limit: 2362)
   CGroup: /system.slice/code-server.service
           ├─3236 /usr/lib/code-server/node /usr/lib/code-server/out/node/entry.js --bind-addr 127.0.0.1:8080 --user-data-dir /var/lib/code-server --auth pas
           └─3258 /usr/lib/code-server/node /usr/lib/code-server/out/node/entry.js --bind-addr 127.0.0.1:8080 --user-data-dir /var/lib/code-server --auth pas

May 12 20:53:29 code-server-update systemd[1]: Started code-server.
May 12 20:53:30 code-server-update code-server[3236]: info  code-server 3.2.0 fd36a99a4c78669970ebc4eb05768293b657716f
May 12 20:53:30 code-server-update code-server[3236]: info  HTTP server listening on http://127.0.0.1:8080
May 12 20:53:30 code-server-update code-server[3236]: info    - Using custom password for authentication
May 12 20:53:30 code-server-update code-server[3236]: info    - Not serving HTTPS
May 12 20:53:30 code-server-update code-server[3236]: info  Automatic updates are enabled
14) To let the code-server start automatically after a server reboot. Run the following command:
sudo systemctl enable code-server
Now. downloading of code-server is complete and available globally. Then, the creation of a systemd service for it is also complete and enabled.
After that, configure Nginx to expose it to your domain as a reverse proxy between the visitor and code-server.
Step 2 - Exposing the code-server at your Domain
1) Now, you will configure Nginx as a reverse proxy for the code-server.
Its configuration files are kept under /etc/nginx/sites-available. It needs to later be symlinked to the /etc/nginx/sites-enabled to make it active.
2) After that, store the configuration for exposing the code-server at the domain. It is in a file named code-server.conf, under /etc/nginx/sites-available. Start by creating it using the editor.
sudo nano /etc/nginx/sites-available/code-server.conf
Now, you will add the following lines:
server {
    listen 80;
    listen [::]:80;

    server_name code-server.your-domain;

    location / {
      proxy_pass http://localhost:8080/;
      proxy_set_header Upgrade $http_upgrade;
      proxy_set_header Connection upgrade;
      proxy_set_header Accept-Encoding gzip;
    }
}
3) Then, replace code-server.your-domain with your desired domain name.
4) After that, save and close the file. Here, you need to define that Nginx should listen to the HTTP port 80. Moreover, you specify a server_name, that tells Nginx for which domain to accept requests and apply the configuration. For root location (/), it specifies that requests should be passed back and forth to the code-server at localhost:8080. Next starting with proxy_set_header, orders Nginx to carry over some HTTP request headers. These are needed for the correct functioning of the WebSockets, which code-server optimally uses.
5) You will then need to make the configuration active. For this create a symlink of it in the /etc/nginx/sites-enabled folder by running the following command:
sudo ln -s /etc/nginx/sites-available/code-server.conf /etc/nginx/sites-enabled/code-server.conf
6) Next, test the validity of configuration, by running the following command:
sudo nginx -t
You will observe the following output:
Output

nginx: the configuration file /etc/nginx/nginx.conf syntax is ok
nginx: configuration file /etc/nginx/nginx.conf test is successful
7) Then, restart Nginx, to make the configuration take effect. Run the following command:
sudo systemctl restart nginx
Now, you will have the code-server installation accessible at your own domain.
Step 3 - Securing your Domain
1) For securing, use the Let’s Encrypt TLS certificate, which you will provision using Certbot.
To install the latest version of Certbot, add its package repository to the server. Run the following command:
sudo add-apt-repository ppa:certbot/certbot
Now press ENTER to accept.
2) You will install both Certbot and its Nginx plugin.
sudo apt install python-certbot-nginx
3) So, you have enabled ufw and configured it to allow unencrypted HTTP traffic. Therefore, to be able to access the secured site, you will configure it to accept encrypted traffic. For this run the following command:
sudo ufw allow https
The output will be:
Output

Rule added
Rule added (v6)
4) For Nginx as well, you will reload it for the configuration to take effect, by:
sudo ufw reload
The output will be:
Output

Firewall reloaded
5) In the browser, navigate to the domain you used for the code-server. Then, you will see a code-server login prompt.
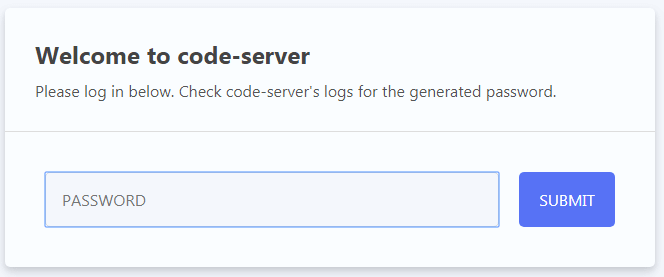
6) Enter the password set in the previous step and then press Enter IDE. After that, you will see the code-server and its editor GUI.
7) Now, the code-server is correctly exposed to your domain. Now, you will install Let’s Encrypt TLS certificates to secure them, using the Certbot. Therefore, to request certificates for the domain, run the following code:
sudo certbot --nginx -d code-server.your-domain
8) Here, the certbot requests certificates for your domain, passed with the -d parameter. Also, the --nginx flag tells to automatically change Nginx site configuration to support the HTTPS. Even remember to replace code-server.your-domain with the domain name.
If you are running it for the first time, you will have to give your email address for urgent notices. As well as to accept the EFF’s Terms of Services. Certbot will also request certificates for domain from Let’s Encrypt. Then it will ask you if you want to redirect all HTTP traffic to HTTPS:
Output

Please choose whether or not to redirect HTTP traffic to HTTPS, removing HTTP access.
- - - - - - - - - - - - - - - - - - - - - - - - - - - - - - - - - - - - - - - -
1: No redirect - Make no further changes to the webserver configuration.
2: Redirect - Make all requests redirect to secure HTTPS access. Choose this for
new sites, or if you're confident your site works on HTTPS. You can undo this
change by editing your web server's configuration.
- - - - - - - - - - - - - - - - - - - - - - - - - - - - - - - - - - - - - - - -
Select the appropriate number [1-2] then [enter] (press 'c' to cancel):
9) It is advisable to select the second option so to maximize security. After you enter your selection, press ENTER.
The output will look like this:
Output

IMPORTANT NOTES:
- Congratulations! Your certificate and chain have been saved at:
 /etc/letsencrypt/live/code-server.your-domain/fullchain.pem
 Your key file has been saved at:
 /etc/letsencrypt/live/code-server.your-domain/privkey.pem
 Your cert will expire on ... To obtain a new or tweaked
 version of this certificate in the future, simply run certbot again
 with the "certonly" option. To non-interactively renew *all* of
 your certificates, run "certbot renew"
- Your account credentials have been saved in your Certbot
 configuration directory at /etc/letsencrypt. You should make a
 secure backup of this folder now. This configuration directory will
 also contain certificates and private keys obtained by Certbot so
 making regular backups of this folder is ideal.
- If you like Certbot, please consider supporting our work by:

 Donating to ISRG / Let's Encrypt:   https://letsencrypt.org/donate
 Donating to EFF:                    https://eff.org/donate-le
Now, the Certbot has successfully generated the TLS certificates and applied them to the Nginx configuration. Now can reload your code-server domain in the browser. You will observe a padlock to the left of the site address, which means that your connection is secure.
So, you have the code-server accessible at the domain via a secured Nginx reverse proxy.
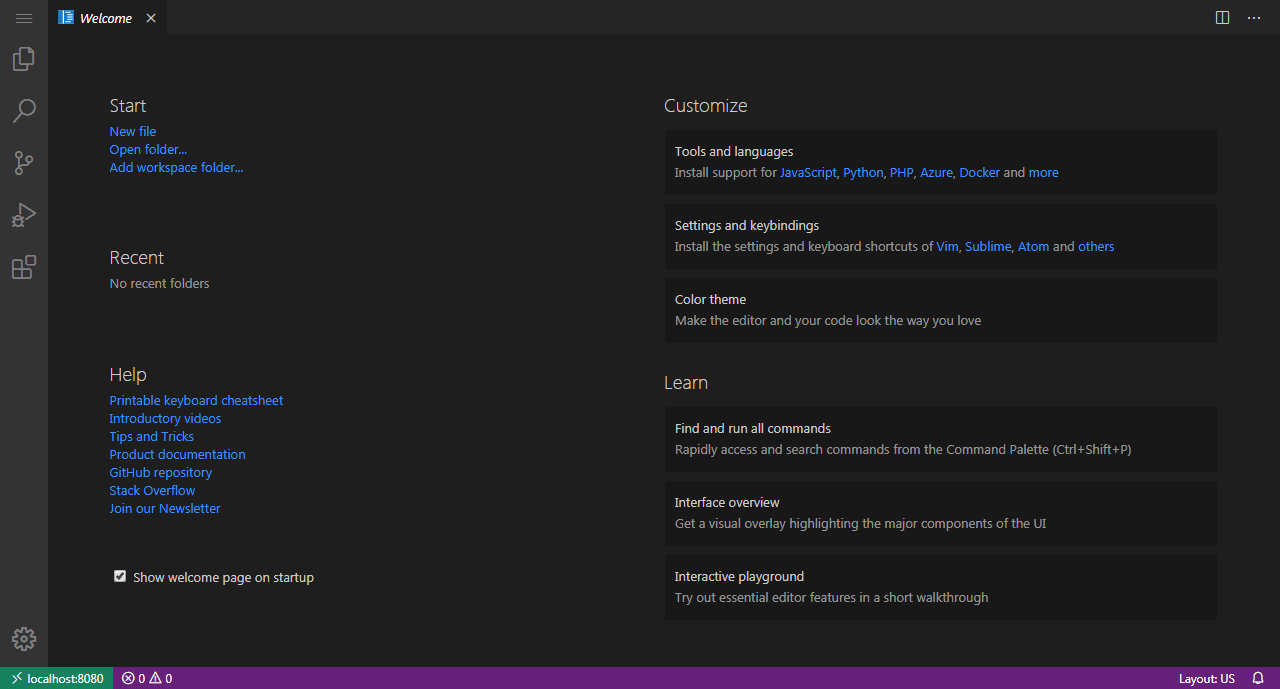
Step 4 - Using code-server Interface
Now, you will use some of the features of the code-server interface. It has a similar interface basically to the desktop version.
1) On the left-hand side of the IDE, there is a vertical row of 6 buttons. It opens the most commonly used features in a side panel called the Activity Bar.
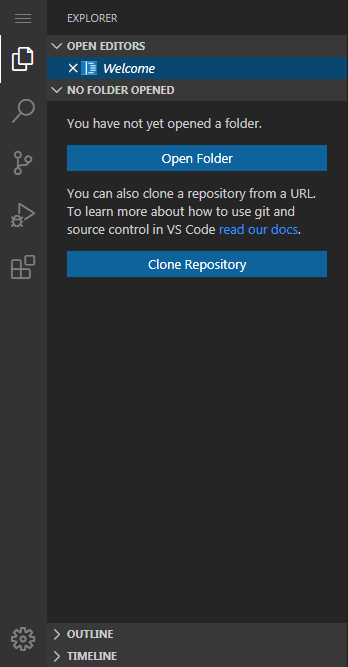
2) The bar is mostly customizable enabling you to move these views to a different order or remove them. So, by default, the first button opens a general menu in the drop-down. The second view opens the Explorer panel providing tree-like navigation of the project’s structure. You will be able to manage folders as well as files. You can create, delete, move, and even rename them as necessary. Then, the next view gives access to a search and the replacement functionality.
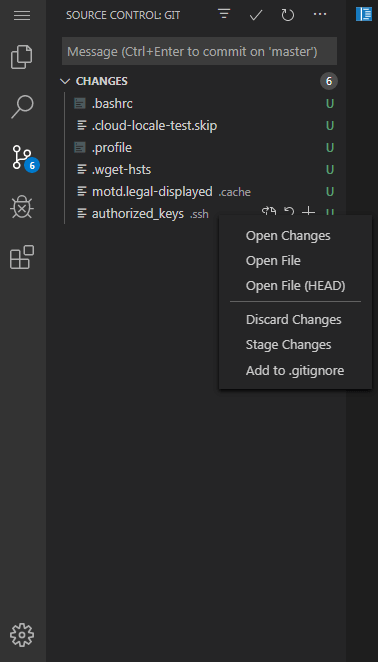
Likewise, in this default order, is a view of your source control systems, like Git. The Visual Studio Code also supports other source control providers and you can find further information in the documentation.
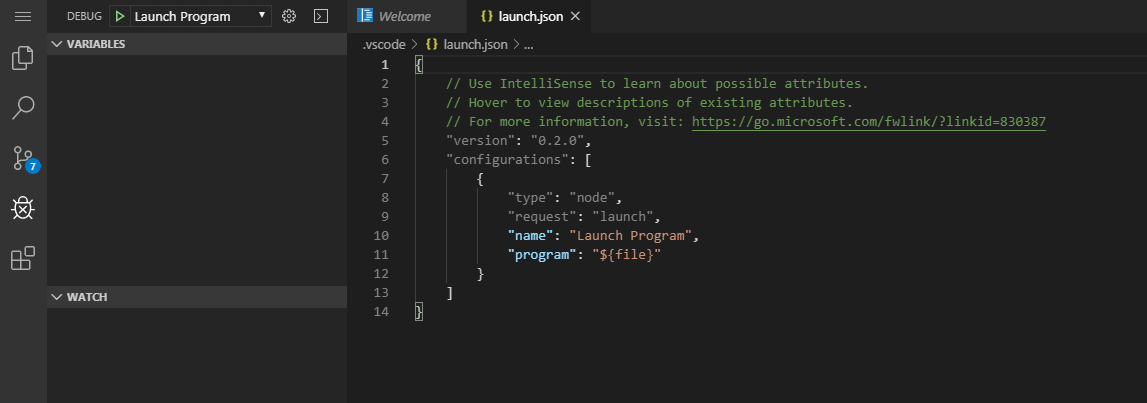
3) Now, the debugger option present on the Activity Bar provides all the necessary actions for debugging in a panel. The Visual Studio Code contains built-in support for Node.js runtime debugger for language, that trans-piles to Javascript. And for other languages, you can install extensions for the necessary debugger. You will be able to save debugging configurations in the launch.json file.
4) Also, the final view in the Activity Bar gives a menu to access the available extensions on the Marketplace.

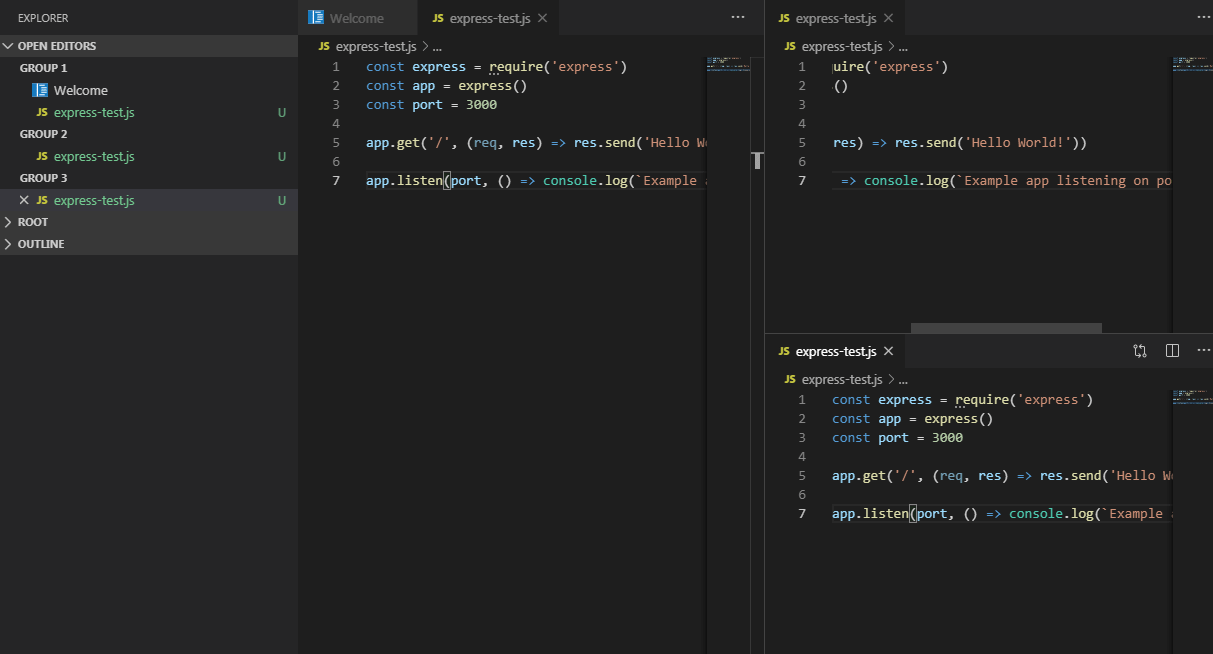
5) The main part of the GUI is actually your editor. You can separate it by tabs for code editing. Also, it enables you to change your editing view to grid system or side-by-side files.
6) After that, create a new file from the File menu. You will see an empty file open in a new tab. After saving the file’s name will be viewable in the Explorer side panel.
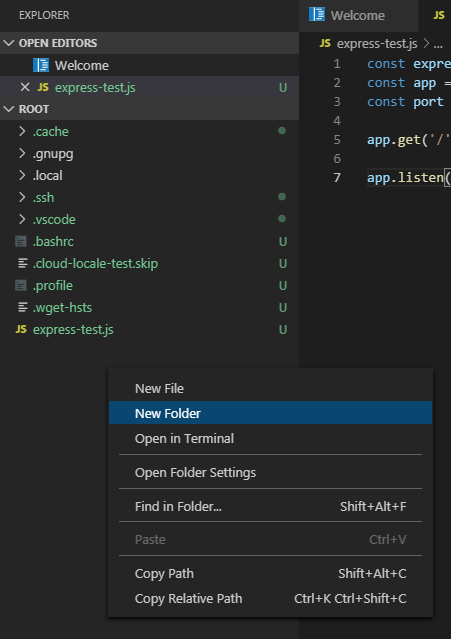
Creating new folders can be done by right-clicking on the Explorer sidebar, then New Folder. It will enable you to expand a folder by clicking on its name. Also, enables to drag and drop files and folders to the upper parts, to move them to a new location.
7) You will have the access to a terminal by entering the CTRL+SHIFT+`, or by clicking on Terminal in the upper menu. Now select the New Terminal. Therefore, the terminal will open in the lower panel. Also, its working directory will be set to the project’s workspace, containing files and folders in the Explorer side panel.
Now, you should have a high-level overview of the code-server interface and its common features.
FAQs to Setup code-server on Ubuntu 20.04
Can I access code-server from any web browser?
Yes, code-server is designed to work with various modern web browsers, including Chrome, Firefox, and Safari.
How do I start and stop code-server?
You can start code-server by executing the code-server command in the terminal. To stop it, press Ctrl + C in the terminal window where it is running.
Can I customize the code-server environment?
Yes, code-server allows you to install extensions, themes, and customize the settings just like in Visual Studio Code. You can enhance your development experience by personalizing the code-server environment.
Can I work on code-server without an internet connection?
Yes, code-server works locally on your Ubuntu 20.04 machine even without an internet connection. You can access code-server using localhost (127.0.0.1) in the browser.
Is code-server resource-intensive?
Code-server is lightweight compared to running a full-fledged IDE locally. However, resource usage may vary depending on the size of the projects and the number of extensions used.
Can I access code-server remotely over the internet?
Yes, you can configure your router to forward the code-server port (default is 8080) and access it remotely via your public IP or domain.
Can I access my local files and folders from within code-server?
Yes, code-server provides access to your local files and folders through the file explorer in the web interface. You can work with your existing projects and access files on your Ubuntu 20.04 machine.
Conclusion
Setting up code-server on Ubuntu 20.04 offers numerous advantages for remote development. Code-server provides a web-based interface to access Visual Studio Code (VS Code) from any browser, allowing convenient and secure coding from remote locations. By following the setup process and configuring code-server with authentication and encryption, you can create a secure development environment.
Additionally, code-server's flexibility allows for customization, including the installation of extensions and customization of themes. With the ability to access local files and collaborate in real-time, code-server simplifies remote coding on Ubuntu 20.04, providing a powerful and accessible development environment.
If you have any queries, please leave a comment below and we’ll be happy to respond to them for sure.