
Choose a different version or distribution
Before we begin talking about how to install Odoo 15 on Ubuntu 20.04, let's briefly understand – What is Odoo 15?
Odoo 15 is a versatile and user-friendly business management software that offers a comprehensive suite of applications to streamline various aspects of your business. It provides modules for accounting, inventory management, customer relationship management (CRM), project management, and more.
With its intuitive interface and customizable features, Odoo 15 empowers businesses of all sizes to improve efficiency, enhance productivity, and make data-driven decisions. Its open-source nature allows for easy customization and integration with other systems. Upgrade to Odoo 15 for a seamless and efficient business management solution.
In this tutorial, we will explain how to install and deploy Odoo 15 in a Python virtual environment on Ubuntu 20.04. We'll use Nginx as a reverse proxy and download Odoo from the official GitHub repository. We will also address a few FAQs on how to install Odoo 15 on Ubuntu 20.04.
Advantages of Odoo 15
- Versatile Business Management: Odoo 15 offers a comprehensive suite of applications for accounting, CRM, inventory, and more, allowing businesses to manage multiple aspects from a single platform.
- Enhanced Efficiency: With its intuitive interface and customizable features, Odoo 15 streamlines processes, improves productivity, and reduces manual efforts.
- Data-Driven Decision-Making: Odoo 15 provides real-time insights and analytics, enabling businesses to make informed decisions based on accurate data.
- Scalability and Flexibility: Odoo 15 caters to businesses of all sizes, allowing them to easily scale operations and adapt the software to their specific needs.
- Open-Source Customization: Being open-source, Odoo 15 offers endless customization possibilities, allowing businesses to tailor the software to their unique requirements and integrate with other systems.
Install Dependencies
The first step is to install Git, Pip, Node.js, and development [build tools].
sudo apt update
sudo apt install git python3-pip build-essential wget python3-dev python3-venv \
    python3-wheel libfreetype6-dev libxml2-dev libzip-dev libldap2-dev libsasl2-dev \
    python3-setuptools node-less libjpeg-dev zlib1g-dev libpq-dev \
    libxslt1-dev libldap2-dev libtiff5-dev libjpeg8-dev libopenjp2-7-dev \
    liblcms2-dev libwebp-dev libharfbuzz-dev libfribidi-dev libxcb1-dev
Create a System User
Running Odoo as the root user poses a significant security risk. The Odoo service will be run by a new system user and group with the home directory /opt/odoo15. Run the following command to accomplish this:
sudo useradd -m -d /opt/odoo15 -U -r -s /bin/bash odoo15
You can name the user whatever you want, as long as you don't create another PostgreSQL user with the same name.
Install and Configure PostgreSQL
Odoo's database backend is PostgreSQL. PostgreSQL is available in the Ubuntu standard repositories. The setup is straightforward:
sudo apt install postgresql
After installing the service, create a PostgreSQL user with the same name as the previously created system user. In this case, it is odoo15:
sudo su - postgres -c "createuser -s odoo15"
Installing wkhtmltopdf
wkhtmltopdf is a collection of open-source command-line tools for converting HTML pages to PDF and other image formats. You must install the wkhtmltox package in Odoo in order to print PDF reports.
The wkhtmltopdf version included in the Ubuntu repositories does not support headers and footers. Odoo version 0.12.5 is the recommended version. We'll get the package from GitHub and install it:
sudo wget https://github.com/wkhtmltopdf/wkhtmltopdf/releases/download/0.12.5/wkhtmltox_0.12.5-1.bionic_amd64.deb
Once the file is downloaded, install it by typing:
sudo apt install ./wkhtmltox_0.12.5-1.bionic_amd64.deb
Install and Configure Odoo 15
We'll install Odoo from the ground up in a separate Python virtual environment.
At first, change to user “odoo15”:
sudo su - odoo15
GitHub clones the Odoo 15 source code:
git clone https://www.github.com/odoo/odoo --depth 1 --branch 15.0 /opt/odoo15/odoo
Make a new Odoo Python virtual environment:
cd /opt/odoo15
python3 -m venv odoo-venv
Turn on the virtual environment:
source odoo-venv/bin/activate
The requirements.txt file defines Odoo dependencies. Using pip3, install all required Python modules:
pip3 install wheel
pip3 install -r odoo/requirements.txt
After that, disable the environment by typing:
deactivate
We'll make a new directory specifically for third-party addons:
mkdir /opt/odoo15/odoo-custom-addons
This directory will be added to the addons_path parameter later. This parameter specifies a list of directories in which Odoo looks for modules.
Return to your sudo user:
exit
Make a configuration file with the following information:
sudo nano /etc/odoo15.conf
[options]
; This is the password that allows database operations:
admin_passwd = my_admin_passwd
db_host = False
db_port = False
db_user = odoo15
db_password = False
addons_path = /opt/odoo15/odoo/addons,/opt/odoo15/odoo-custom-addons
my_admin_passwd to something more secure.Create Systemd Unit File
A unit file is an ini-style configuration file that contains information about a service.
Open your text editor and type the following into a file called odoo15.service:
sudo nano /etc/systemd/system/odoo15.service
[Unit]
Description=Odoo15
Requires=postgresql.service
After=network.target postgresql.service

[Service]
Type=simple
SyslogIdentifier=odoo15
PermissionsStartOnly=true
User=odoo15
Group=odoo15
ExecStart=/opt/odoo15/odoo-venv/bin/python3 /opt/odoo15/odoo/odoo-bin -c /etc/odoo15.conf
StandardOutput=journal+console

[Install]
WantedBy=multi-user.target
Notify systemd that a new unit file has been created:
sudo systemctl daemon-reload
Start the Odoo service and make it start automatically by running:
sudo systemctl enable --now odoo15
Check that the service is up and running:
sudo systemctl status odoo15
The output should look like this, indicating that the Odoo service is active and running:
Output

● odoo15.service - Odoo15
     Loaded: loaded (/etc/systemd/system/odoo15.service; enabled; vendor preset: enabled)
     Active: active (running) since Tue 2022-07-26 09:56:28 UTC; 28s ago
...
You can view the messages logged by the Odoo service by running the following command:
sudo journalctl -u odoo15
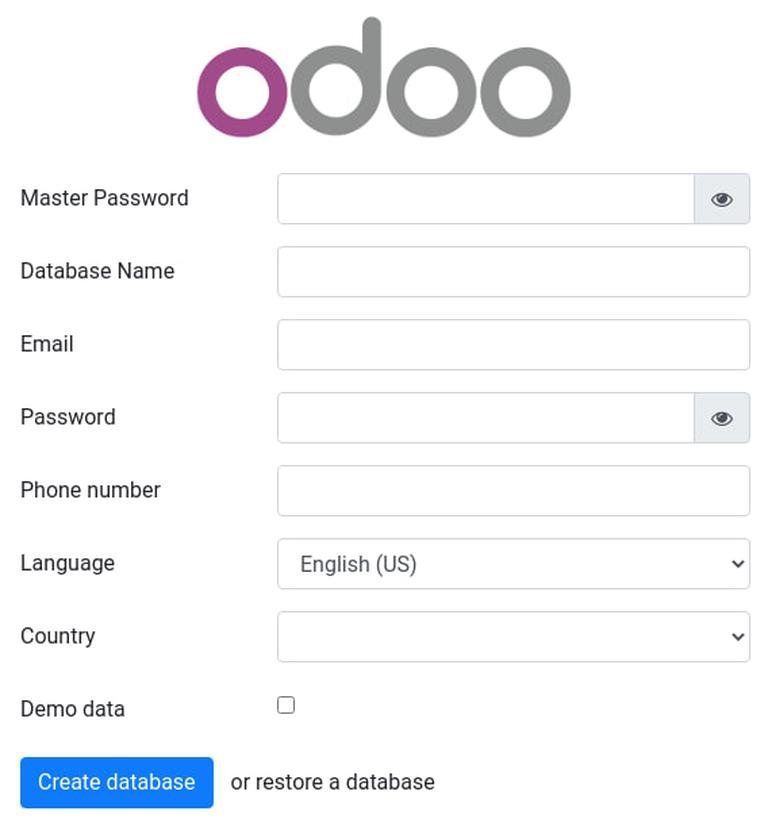
Test the Installation
Enter http://<your_domain_or_IP_address>:8069 in your browser.
Assuming the installation is successful, the following screen will appear:
Configure Nginx as SSL Termination Proxy
The Odoo web server's default protocol is HTTP. To increase the security of the Odoo deployment, we will configure Nginx as an SSL termination proxy that will serve traffic over HTTPS.
A proxy server that handles SSL encryption/decryption is known as an SSL termination proxy. This means that the termination proxy (Nginx) will process and decrypt incoming TLS connections (HTTPS) before passing them on to the internal service (Odoo). Nginx and Odoo traffic will not be encrypted (HTTP).
Load balancing, SSL termination, caching, compression, serving static content, and other advantages come with using a reverse proxy.
Before proceeding with this section, please ensure that you have met the following prerequisites:
- Domain name pointing to the IP address of your public server. We'll go with
example.com. - Nginx installed.
- Your domain's SSL certificate. You can get a free Let's Encrypt SSL certificate.
Open your text editor and add/edit the domain server block as follows:
sudo nano /etc/nginx/sites-enabled/example.com.conf
The configuration below enables SSL termination, HTTP to HTTPS redirection, WWW to non-WWW redirection, static file caching, and GZip compression.
# Odoo servers
upstream odoo {
 server 127.0.0.1:8069;
}

upstream odoochat {
 server 127.0.0.1:8072;
}

# HTTP -> HTTPS
server {
    listen 80;
    server_name www.example.com example.com;

    include snippets/letsencrypt.conf;
    return 301 https://example.com$request_uri;
}

# WWW -> NON WWW
server {
    listen 443 ssl http2;
    server_name www.example.com;

    ssl_certificate /etc/letsencrypt/live/example.com/fullchain.pem;
    ssl_certificate_key /etc/letsencrypt/live/example.com/privkey.pem;
    ssl_trusted_certificate /etc/letsencrypt/live/example.com/chain.pem;
    include snippets/ssl.conf;
    include snippets/letsencrypt.conf;

    return 301 https://example.com$request_uri;
}

server {
    listen 443 ssl http2;
    server_name example.com;

    proxy_read_timeout 720s;
    proxy_connect_timeout 720s;
    proxy_send_timeout 720s;

    # Proxy headers
    proxy_set_header X-Forwarded-Host $host;
    proxy_set_header X-Forwarded-For $proxy_add_x_forwarded_for;
    proxy_set_header X-Forwarded-Proto $scheme;
    proxy_set_header X-Real-IP $remote_addr;

    # SSL parameters
    ssl_certificate /etc/letsencrypt/live/example.com/fullchain.pem;
    ssl_certificate_key /etc/letsencrypt/live/example.com/privkey.pem;
    ssl_trusted_certificate /etc/letsencrypt/live/example.com/chain.pem;
    include snippets/ssl.conf;
    include snippets/letsencrypt.conf;

    # log files
    access_log /var/log/nginx/odoo.access.log;
    error_log /var/log/nginx/odoo.error.log;

    # Handle longpoll requests
    location /longpolling {
        proxy_pass http://odoochat;
    }

    # Handle / requests
    location / {
       proxy_redirect off;
       proxy_pass http://odoo;
    }

    # Cache static files
    location ~* /web/static/ {
        proxy_cache_valid 200 90m;
        proxy_buffering on;
        expires 864000;
        proxy_pass http://odoo;
    }

    # Gzip
    gzip_types text/css text/less text/plain text/xml application/xml application/json application/javascript;
    gzip on;
}
example.com with your Odoo domain and to specify the correct path to the SSL certificate files.After that, restart the Nginx service:
sudo systemctl restart nginx
Next, we must instruct Odoo to use the proxy. To accomplish this, open the configuration file and insert the following line:
proxy_mode = True
To make the changes take effect, restart the Odoo service:
sudo systemctl restart odoo15
The reverse proxy is now set up, and you can access your Odoo instance at https://example.com.
Change the Binding Interface
This is an optional step, but it is a good security practice.
The Odoo server listens on the port 8069 on all interfaces by default. You can either block port 8069 for all public interfaces or force Odoo to listen only on the local interface to disable direct access to the Odoo instance.
We'll configure Odoo to only listen on 127.0.0.1. Open the configuration file and add the following two lines at the end: /etc/odoo15.conf
xmlrpc_interface = 127.0.0.1
netrpc_interface = 127.0.0.1
To make the changes take effect, save the configuration file and restart the Odoo server:
sudo systemctl restart odoo15
Enabling Multiprocessing
Odoo operates in multithreading mode by default. It is recommended to switch to a multiprocessing server for production deployments because it improves stability and makes better use of system resources.
You must edit the Odoo configuration and specify a non-zero number of worker processes to enable multiprocessing. The number of workers is determined by the number of CPU cores in the system and the amount of RAM memory available.
According to the official Odoo documentation, you can use the following formulas and assumptions to calculate the number of workers and required RAM memory size:
Worker number calculation
- Theoretical maximum worker number = (system_cpus * 2) + 1
- 1 worker is able to serve ~= 6 simultaneous users
- Workers of cron requires CPU
RAM memory size calculation
- We will assume that 20% of all requests are heavy, and the remaining 80% are light. Heavy requests consume approximately 1 GB of RAM, while light requests consume approximately 150 MB of RAM.
- RAM was required. =
number_of_workers * ( (light_worker_ratio * light_worker_ram_estimation) + (heavy_worker_ratio * heavy_worker_ram_estimation) )
If you don't know how many CPUs are on your system, use the grep command:
grep -c ^processor /proc/cpuinfo
Assume you have a system with four CPU cores, eight gigabytes of RAM memory, and 30 concurrent Odoo users.
30 users / 6 = **5**(5 is a theoretical number of workers needed)(4 * 2) + 1 = **9**(9 is the theoretical maximum number of workers)
Based on the above calculation, you can use 5 workers + 1 worker for the cron worker, for a total of 6 workers.
Determine the RAM memory consumption based on the number of employees:
RAM = 6 * ((0.8*150) + (0.2*1024)) ~= 2 GB of RAM
According to the calculations, the Odoo installation will require approximately 2 GB of RAM.
To enable multiprocessing, open the configuration file and append the following values:
limit_memory_hard = 2684354560
limit_memory_soft = 2147483648
limit_request = 8192
limit_time_cpu = 600
limit_time_real = 1200
max_cron_threads = 1
workers = 5
To make the changes take effect, restart the Odoo service:
sudo systemctl restart odoo15
Other services that run on this system will use the remaining system resources. In this tutorial, we installed Odoo on the same server as PostgreSQL and Nginx. Other services may be running on your server, depending on your configuration.
FAQs to Install Odoo 15 on Ubuntu 20.04
What are the system requirements for installing Odoo 15 on Ubuntu 20.04?
The recommended system requirements include a 64-bit processor, 4 GB of RAM, and at least 20 GB of free disk space.
Does Odoo 15 require any additional software or libraries?
Yes, Odoo 15 relies on several additional software and libraries such as PostgreSQL, Python, and various Python packages. The installation guide provides instructions on installing these dependencies.
Can I use a virtual environment to install Odoo 15 on Ubuntu 20.04?
Yes, using a virtual environment is a recommended approach to isolate Odoo and its dependencies. It ensures better control over the software and its dependencies.
Can I access Odoo 15 through a web browser after installation?
Yes, once installed, you can access Odoo 15 through a web browser by entering the server's IP address or domain name followed by the specified port number.
Can I install multiple Odoo instances on the same server?
Yes, you can install multiple Odoo instances on the same server by configuring each instance to use a unique port number and database.
How do I start and stop the Odoo 15 service on Ubuntu 20.04?
You can start and stop the Odoo 15 service on Ubuntu 20.04 by using the system's init.d scripts or by using the systemctl command.
Is there any support available for troubleshooting installation issues?
Yes, Odoo has an active community and provides support through forums and community channels. You can seek assistance from the community members or consult the official documentation for troubleshooting installation issues.
Conclusion
This tutorial described how to install and configure Odoo 15 in a Python virtual environment using Nginx as a reverse proxy on Ubuntu 20.04. We've also demonstrated how to enable multiprocessing and optimize Odoo for production use.
If you have any queries, please leave a comment below, and we’ll be happy to respond to them.